Asynchronous Task Queue with Django, Celery and AWS SQS
In this technical guide, we’ll explore how to optimize the order processing workflow using Django, Celery 5.0, and AWS Simple Queue Service (SQS). This setup ensures reliable message delivery and scalability, making it ideal for processing a high volume of orders asynchronously.
Contents
1. Introduction
1.1 What is Celery?
Celery is an open-source, distributed task queue system for asynchronous processing in Python. It is designed to handle the execution of tasks outside of the main application flow, allowing for the parallel execution of time-consuming operations. Celery is commonly used for tasks such as sending emails, processing background jobs, and handling periodic tasks.
1.2 What is AWS SQS?
Amazon Simple Queue Service (SQS) is a fully managed message queuing service provided by Amazon Web Services (AWS). SQS enables the decoupling of the components of a cloud application, allowing them to operate independently while still communicating with each other through message queues. It is designed to provide a scalable and reliable solution for distributed systems.
1.3 Scenario Background
Imagine we have a Django e-commerce application that allows users to place orders. Instead of handling order processing synchronously during the checkout, we want to use Celery tasks to process orders asynchronously. This could involve tasks such as updating inventory, generating invoices, and sending confirmation emails. In this tutorial, we will demonstrate how to handle inventory updates asynchronously using Django, Celery and SQS.
2. Setting Up the AWS SQS Queue
Here are the step-by-step instructions to set up AWS SQS as a message broker for our Django application and Celery workers.
2.1 Create an AWS account and IAM user
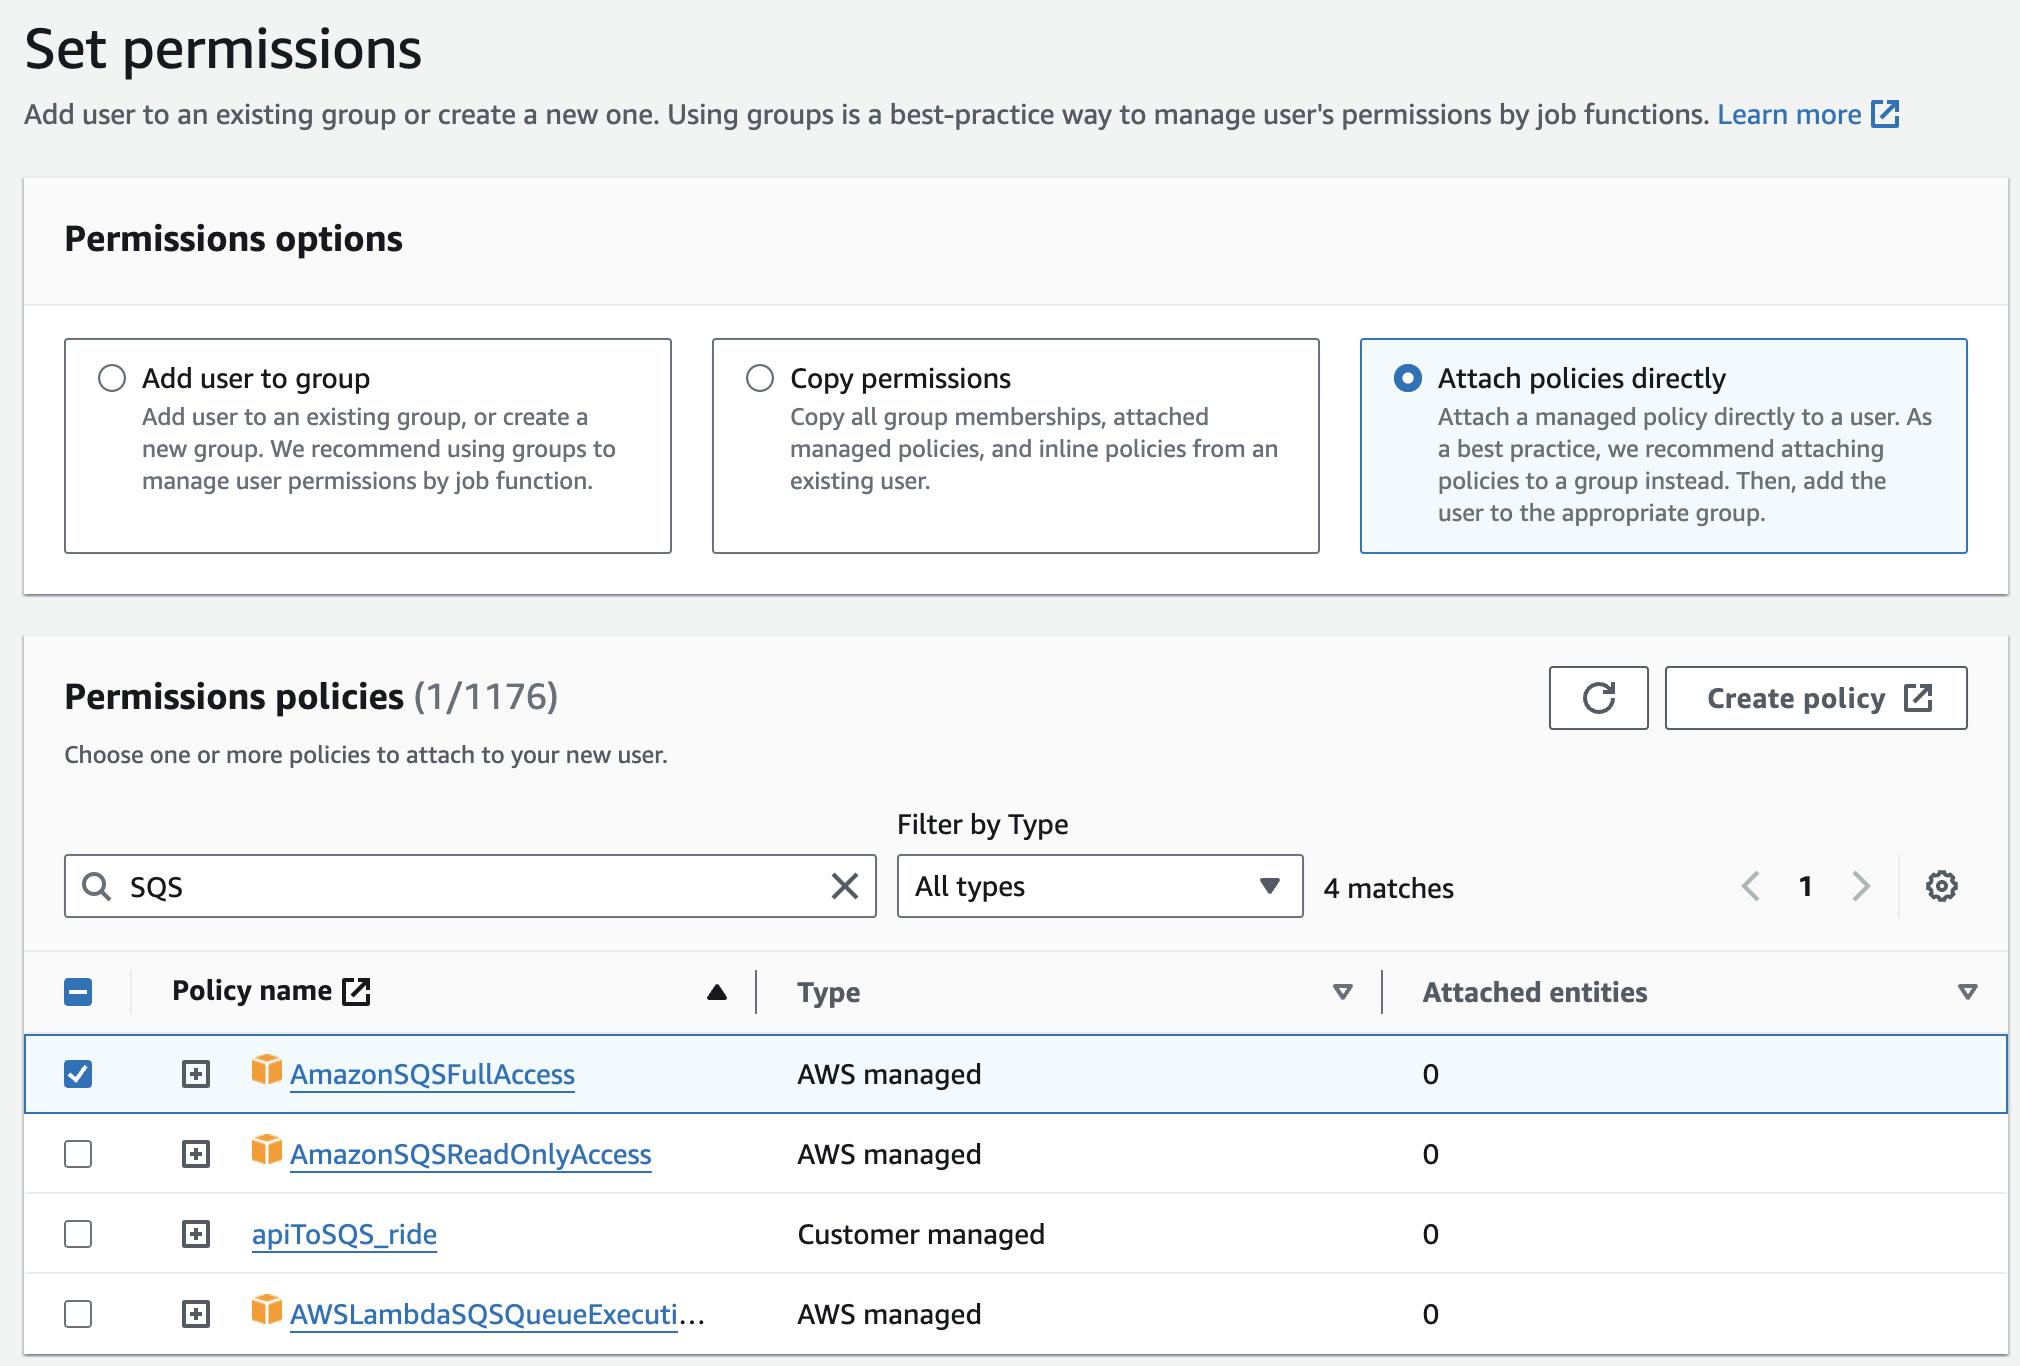
If you don’t already have an AWS account, sign up for one. Then create an IAM user with programmatic access and grant it the necessary permissions to use SQS:
Here we grant AmazonSQSFullAccess full access to SQS policy.
After creating the user, navigate to the Security Credentials tab, click on Create access key and select Application running outside AWS. Note down the Access Key ID and Secret Access Key. We’ll need these in our Django project.
2.2 Setting Up AWS SQS
Navigate to the SQS dashboard in the AWS account and click on Create Queue. Provide a descriptive name for the queue, such as django_order-processing-queue.
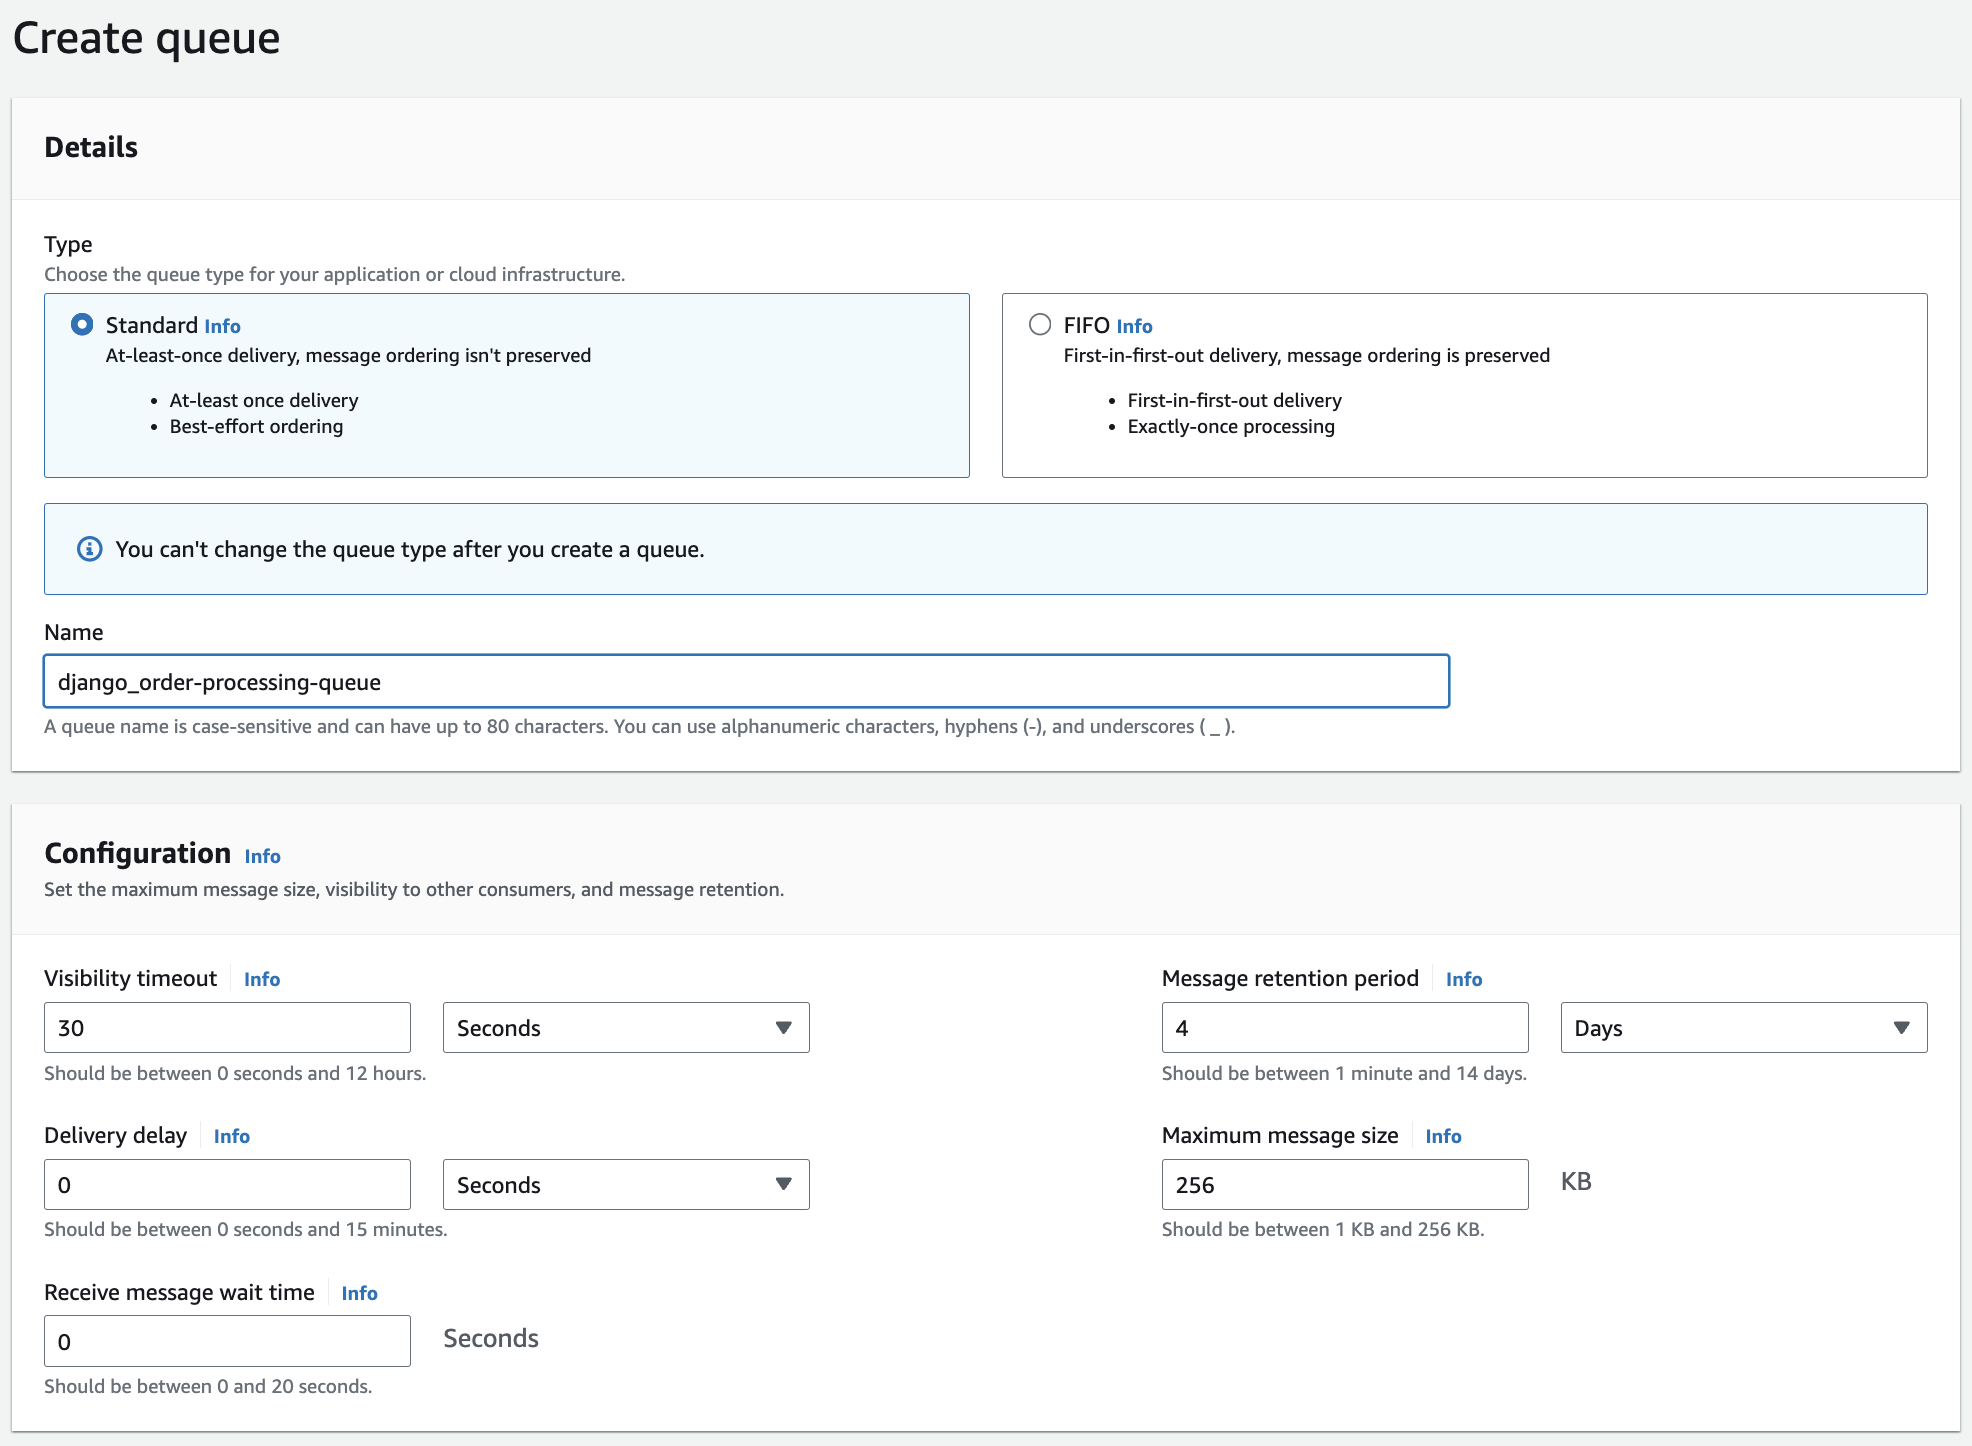
Configure other settings as needed:
- Visibility Timeout: This is the time during which a message is invisible to consumers after it has been received by a worker.
- Delivery Delay: The time a message should stay in the queue before it becomes available for processing.
- Receive Message Wait Time: The maximum time a
ReceiveMessagecall will wait for a message to arrive. - Message Retention Period: The length of time that a message is retained in the queue before it is deleted.
- Maximum Message Size: The maximum size of a message in bytes.
If we set a short polling wait time (close to zero), the ReceiveMessage calls return quickly, but we might end up making frequent, potentially unnecessary requests. If we set a longer wait time, the ReceiveMessage calls will wait for a message, reducing the number of empty responses and providing a more efficient and responsive way to retrieve messages.
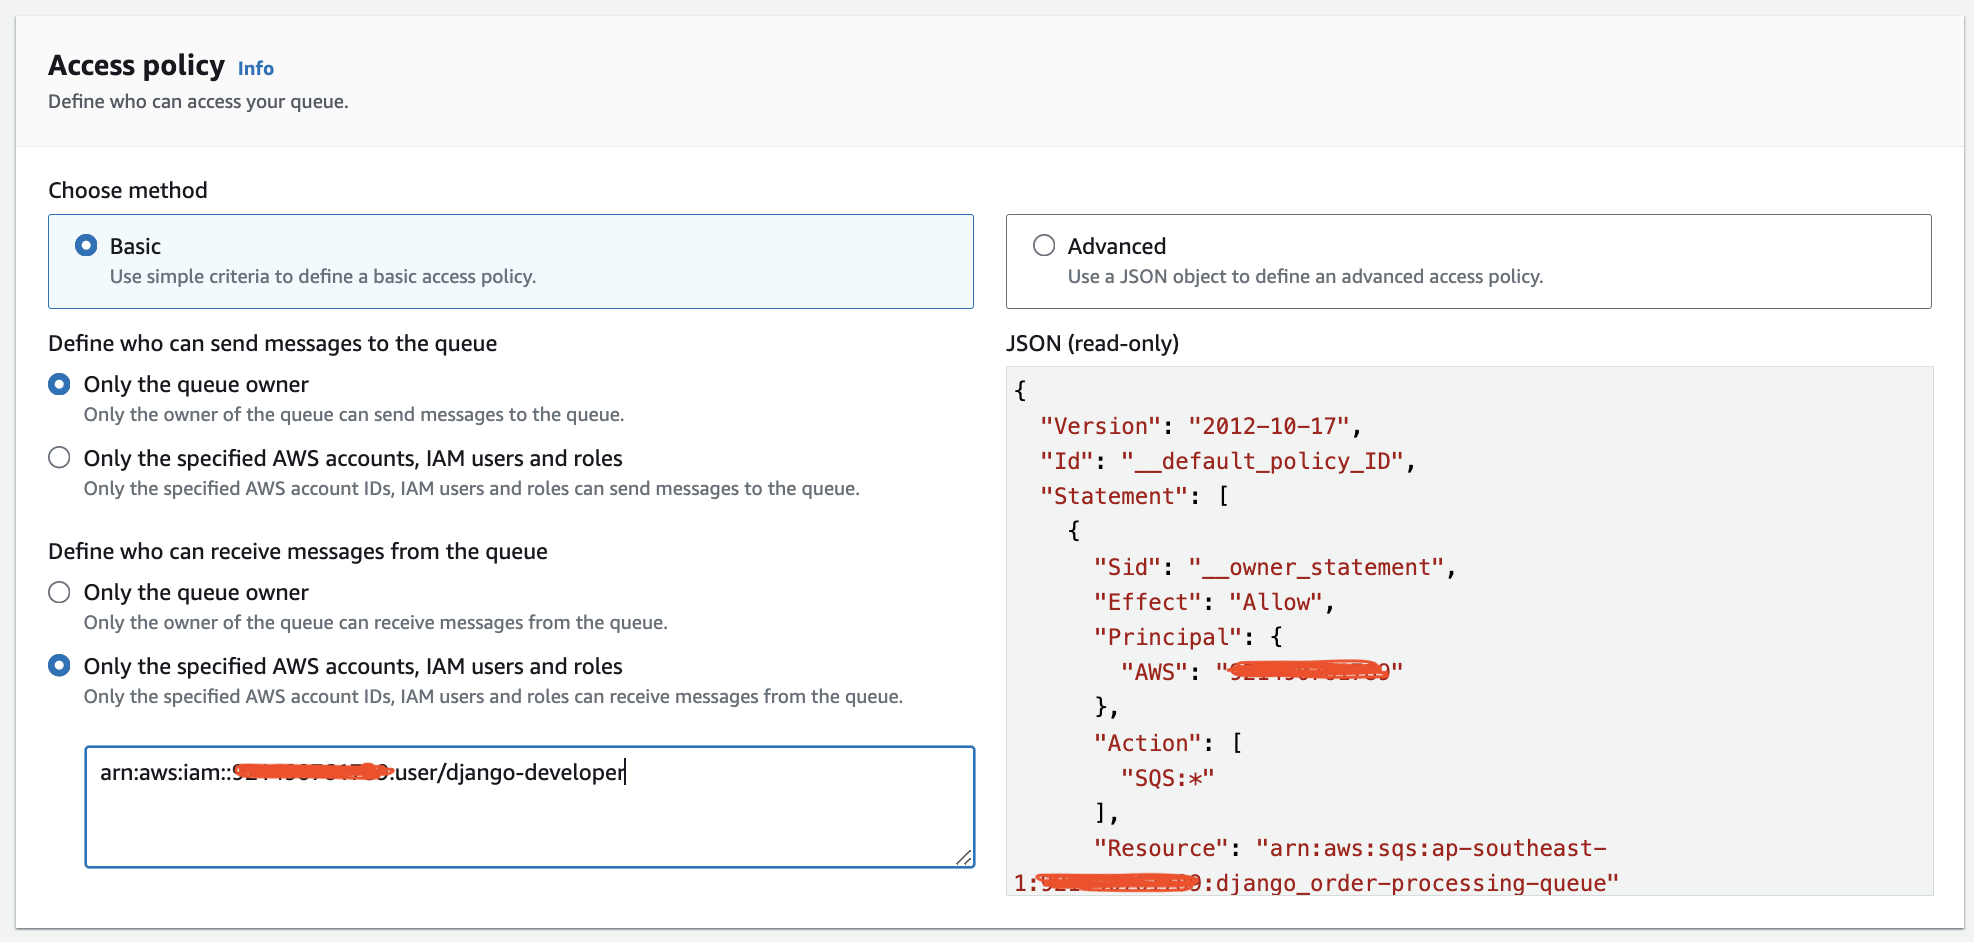
Access Policy
Set up the Access Policy to permit only the user we’ve created to access the queue. This ensures secure and restricted access to the AWS SQS, allowing only authorized entities to interact with it.
3. Integrating Celery with SQS
Firstly, set up a Django project. You may refer to this post to set up a Django project.
3.1 Install the necessary packages
Navigate to the Django project folder, and install the necessary dependencies:
pip3 install celery boto3 pycurl3.2 Create a Celery instance
Create a new backend/celery.py module that defines the Celery instance:
import os
from celery import Celery

os.environ.setdefault("DJANGO_SETTINGS_MODULE", "backend.settings")

app = Celery("backend")

app.config_from_object("django.conf:settings", namespace="CELERY")

# Load task modules from all registered Django apps.
app.autodiscover_tasks()

# simple task to print all the metadata
@app.task(bind=True)
def debug_task(self):
    print('Request: {0!r}'.format(self.request))
Here we use the CELERY_ namespace for all Celery configuration options. This meant that all the Celery configurations must start with CELERY_.
To facilitate the auto-discovery of tasks in reusable apps, a common practice is to define tasks in a separate tasks.py module. Celery’s autodiscover_tasks() function automatically detects tasks in all installed apps, streamlining the process and eliminating the need to manually list each module in the CELERY_IMPORTS setting.
Then we need to import this celery instance into our backend/__init__.pymodule. This ensures that the celery instance is loaded when Django starts so that the @shared_task the decorator will use it:
from .celery import app as celery_app

__all__ = ("celery_app",)
3.3 Configure Celery to Use AWS SQS
In the settings.py file, add the following Celery configuration settings:
CELERY_accept_content = ['application/json']
CELERY_task_serializer = 'json'
CELERY_TASK_DEFAULT_QUEUE = 'order-processing-queue'
CELERY_BROKER_URL = "sqs://%s:%s@" % (os.environ.get('AWS_ACCESS_KEY_ID'), os.environ.get('AWS_SECRET_ACCESS_KEY'))
CELERY_BROKER_TRANSPORT_OPTIONS = {
    "region": "ap-southeast-1",
    'queue_name_prefix': 'django_',
    'visibility_timeout': 30,
    'polling_interval': 1
}
CELERY_RESULT_BACKEND = None
CELERY_TASK_ANNOTATIONS = {'*': {'default_retry_delay': 5, 'max_retries': 3}}
4. Create Celery Tasks
Create a Django app to handle order-related tasks. For example, create a file tasks.py:
from celery import shared_task
from .models import Product
import time

@shared_task(bind=True, max_retries=3, acks_late=True)
def update_product_stock(self, order_id, product_id, quantity):
    try:
        print("Start process_order: %s" % time.ctime())
        print("Order ID : %s" % order_id)
        print("Product ID : %s" % product_id)

        # Simulate some time-consuming operation
        time.sleep(20)

        product = Product.objects.get(pk=product_id)

        product.stock -= quantity
        product.save()

        print(f"Task completed for Order ID {order_id}")
    except Product.DoesNotExist:
        print(f"Product with ID {product_id} does not exist.")
    except Exception as e:
        print(f"An error occurred while updating product stock. Error: {e}")
        raise self.retry(exc=e)
In this example, the max_retries parameter is set to 3, meaning that the task will be retried up to 3 times if it fails. And we set the acks_late to True, Late ack means the task messages will be acknowledged after the task has been executed, not right before (the default behavior).
In the api/view.py, we overwrite the order creation API to trigger the update_product_stock celery tasks as follows:
from .tasks import update_product_stock

def create(self, request, *args, **kwargs):
        serializer = self.get_serializer(data=request.data)
        serializer.is_valid(raise_exception=True)
        self.perform_create(serializer)

        # Call Celery task to update product stock
        update_product_stock.delay(serializer.data['product_id'], serializer.data['quantity'])

        headers = self.get_success_headers(serializer.data)
        return Response(serializer.data, status=status.HTTP_201_CREATED, headers=headers)
5. Configure Celery worker
To configure Celery with Docker, we need to set up a Celery worker that runs alongside our Django application. Here’s how we can modify the docker-compose.yml file and provide additional steps for testing and deployment.
version: '3'

services:
  db:
    image: postgres:latest
    environment:
      POSTGRES_DB: django_api_db
      POSTGRES_USER: postgres
      POSTGRES_PASSWORD: 123456
    ports:
      - "5433:5432"
    volumes:
      - pgdata:/var/lib/postgresql/data/
    networks:
      - mynetwork

  api:
    build: ./backend
    entrypoint: /usr/src/app/entrypoint.sh
    command: python manage.py runserver 0.0.0.0:8000
    volumes:
      - backend:/usr/src/app
    ports:
      - "8000:8000"
    depends_on:
      - db
    environment:
      - DEBUG=True
      - DJANGO_DB_HOST=db
      - DJANGO_DB_PORT=5432
      - DJANGO_DB_NAME=django_api_db
      - DJANGO_DB_USER=postgres
      - DJANGO_DB_PASSWORD=123456
      - AWS_ACCESS_KEY_ID=<YOUR_ACCESS_KEY_ID>
      - AWS_SECRET_ACCESS_KEY=<YOUR_SECRET_ACCESS_KEY>
      - AWS_DEFAULT_REGION=<YOUR_AWS_REGION>
    networks:
      - mynetwork

  celery:
    build: ./backend
    command: celery -A backend worker -l DEBUG -Q order-processing-queue --prefetch-multiplier 1 -c 2 -O fair
    volumes:
      - backend:/usr/src/app
    environment:
      - DJANGO_DB_HOST=db
      - DJANGO_DB_PORT=5432
      - DJANGO_DB_NAME=django_api_db
      - DJANGO_DB_USER=postgres
      - DJANGO_DB_PASSWORD=123456
      - AWS_ACCESS_KEY_ID=<YOUR_ACCESS_KEY_ID>
      - AWS_SECRET_ACCESS_KEY=<YOUR_SECRET_ACCESS_KEY>
      - AWS_DEFAULT_REGION=<YOUR_AWS_REGION>
    depends_on:
      - db
    networks:
      - mynetwork

volumes:
  backend:
  pgdata:

networks:
  mynetwork:
--prefetch-multiplier 1: Configures the prefetch multiplier. This option controls how many messages the worker should prefetch at once. A multiplier of 1 means one message at a time.
-c 2: Sets the concurrency level. This determines how many worker processes should be started. In this case, it’s set to 2, meaning two worker processes.
-O fair: Configures the worker to use the fair dispatching strategy. The fair strategy attempts to distribute tasks more evenly among available workers.
6. Testing
Open Postman and send a POST request to the endpoint where we create orders in our Django application. Make sure you include the necessary information in the request body.
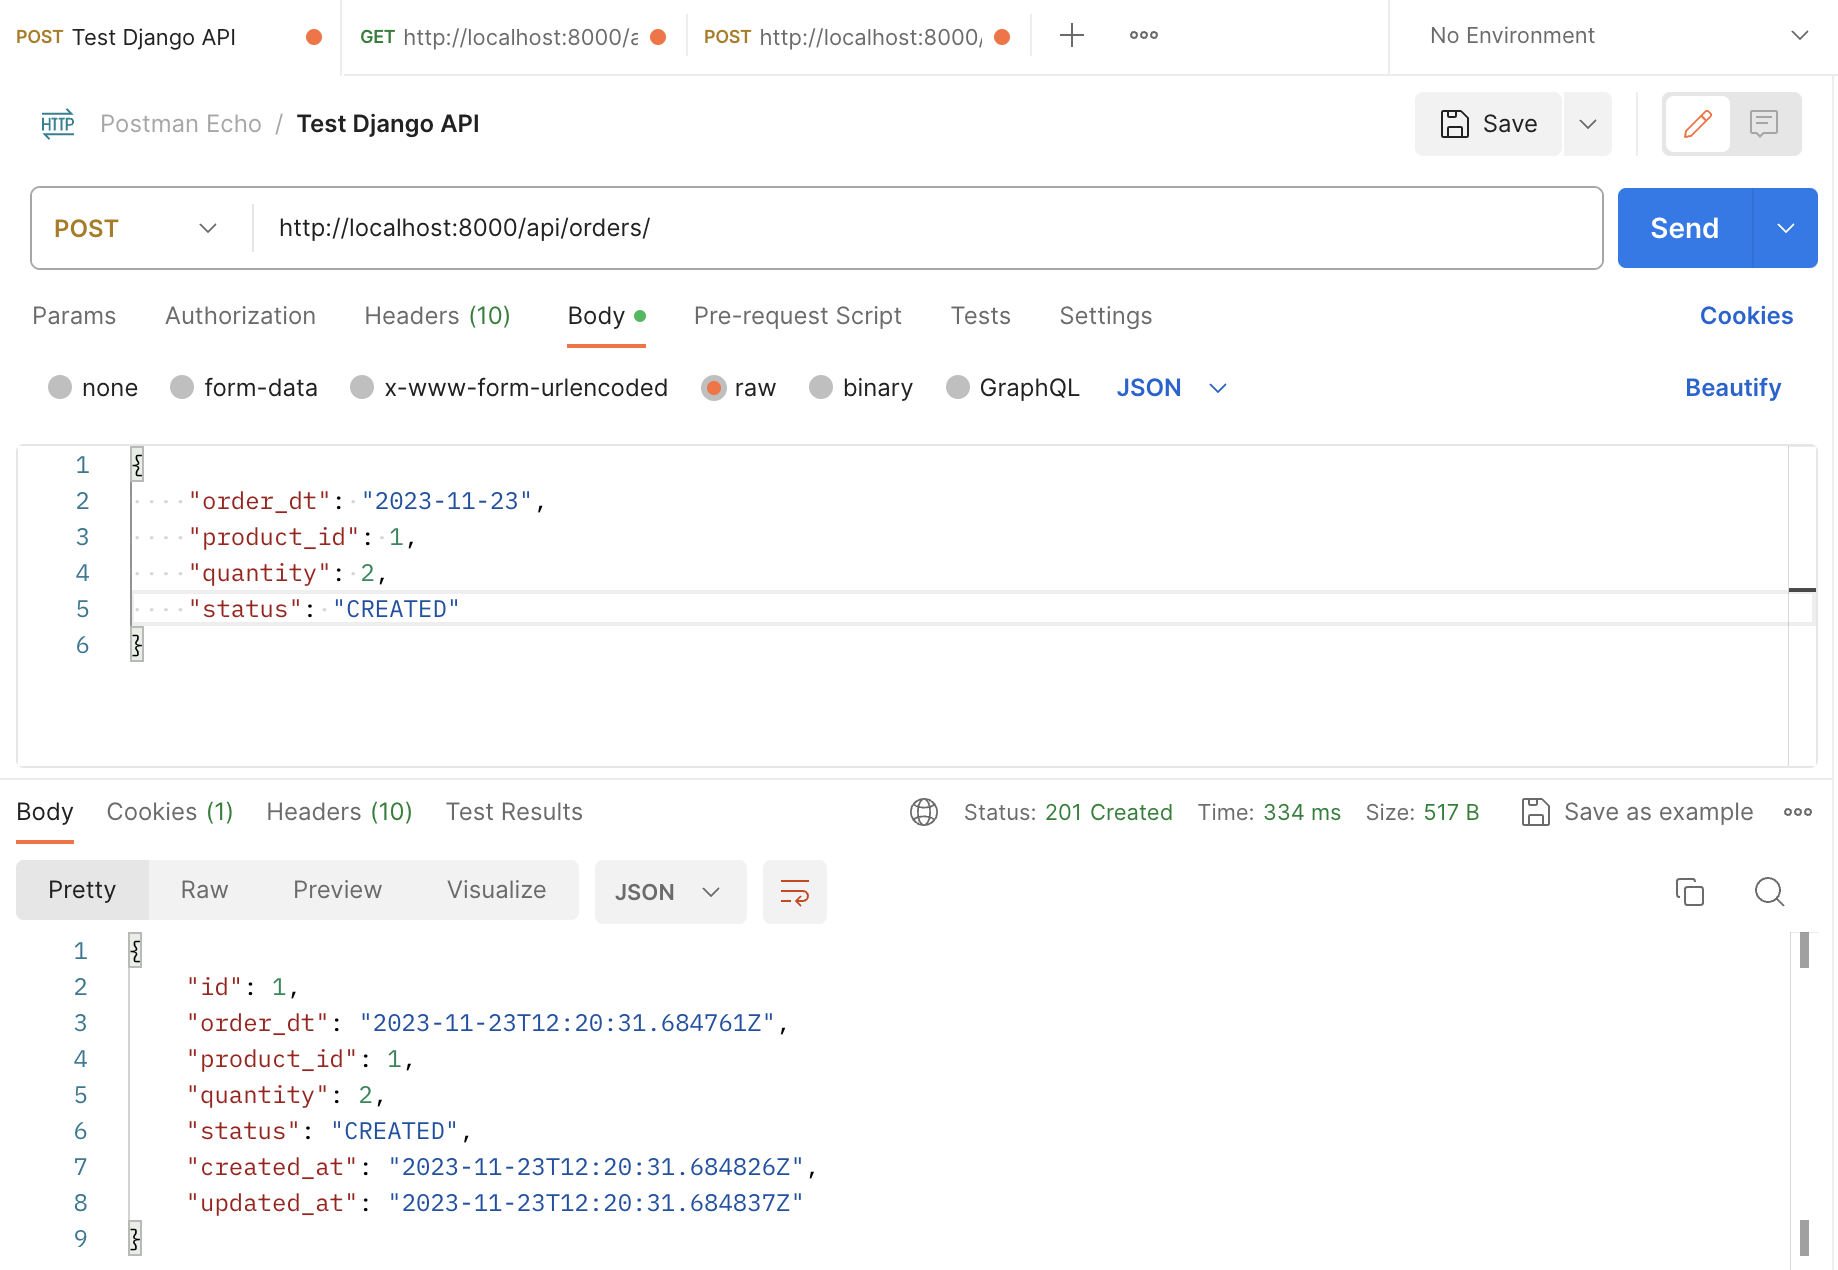
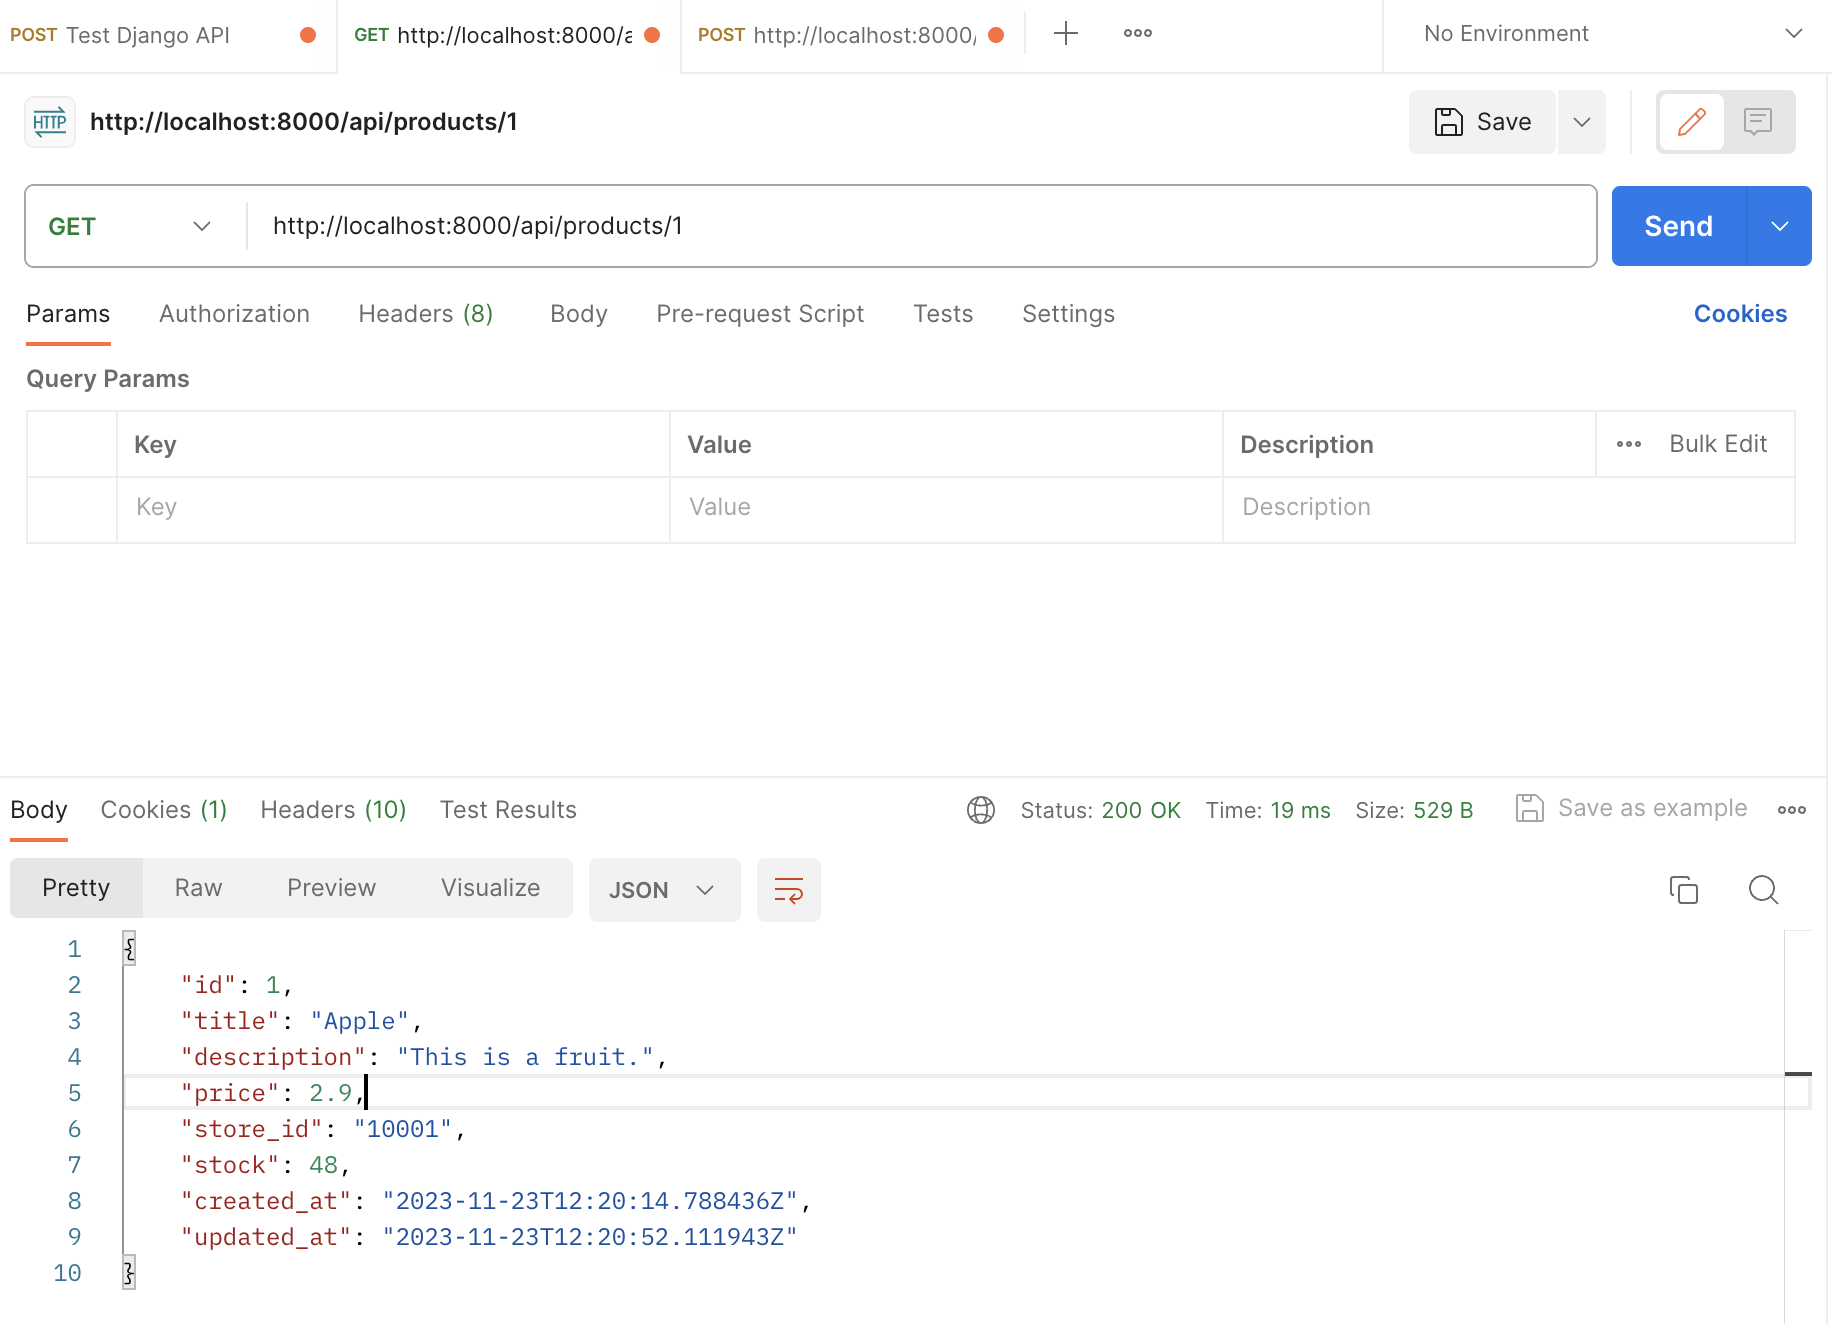
Verify that the product’s stock has been updated after some time.

7. Additional Notes
Now, let’s assume our task running was longer than the VisibilityTimeout we set to our message broker SQS.
...
# Simulate some time-consuming operation
time.sleep(35)
...
Next, let’s restart our docker-compose. In the initial stage, the product stock count is 42.
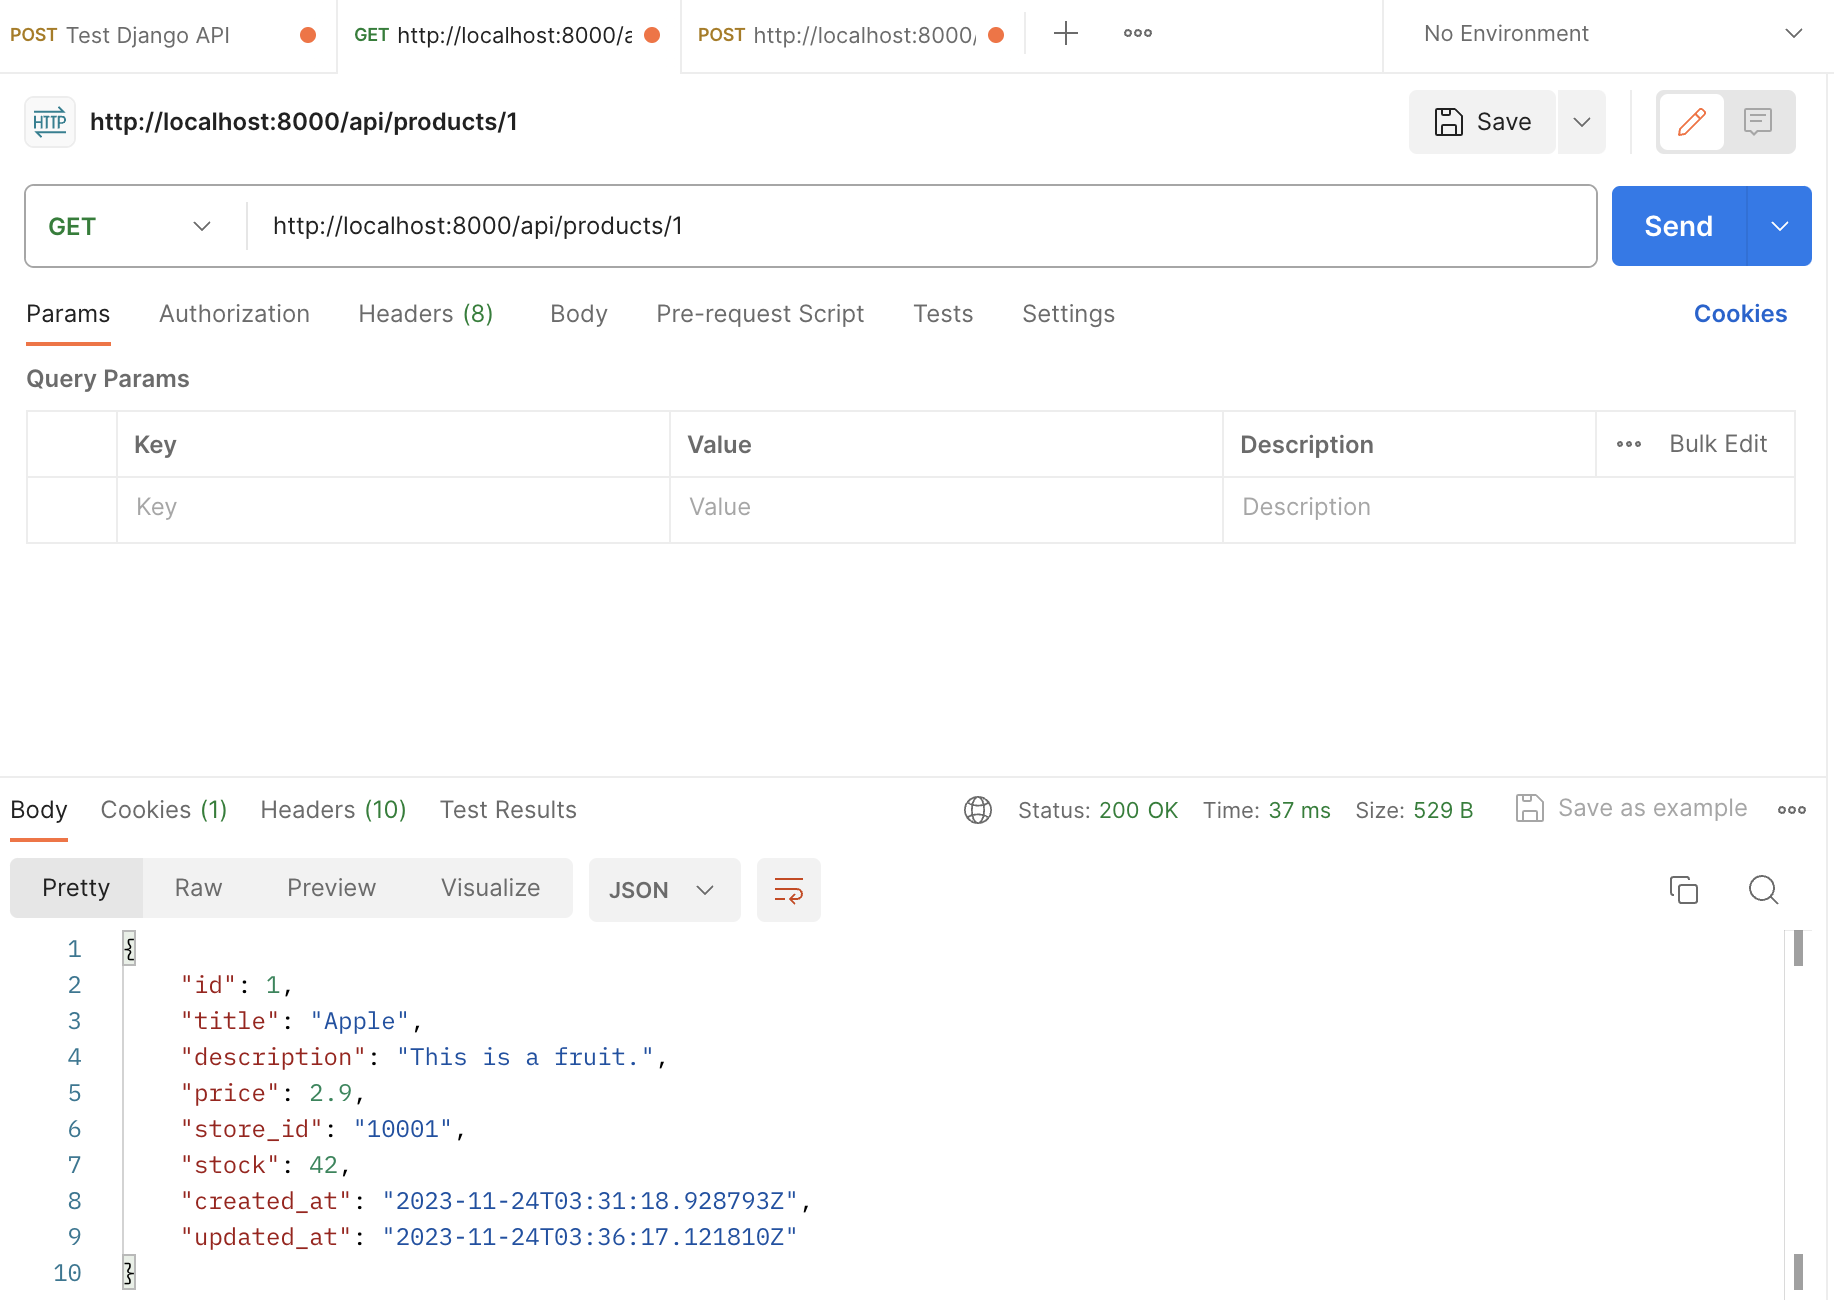
Now, let’s fire the order creation. Now, this task will take 35 seconds to complete.

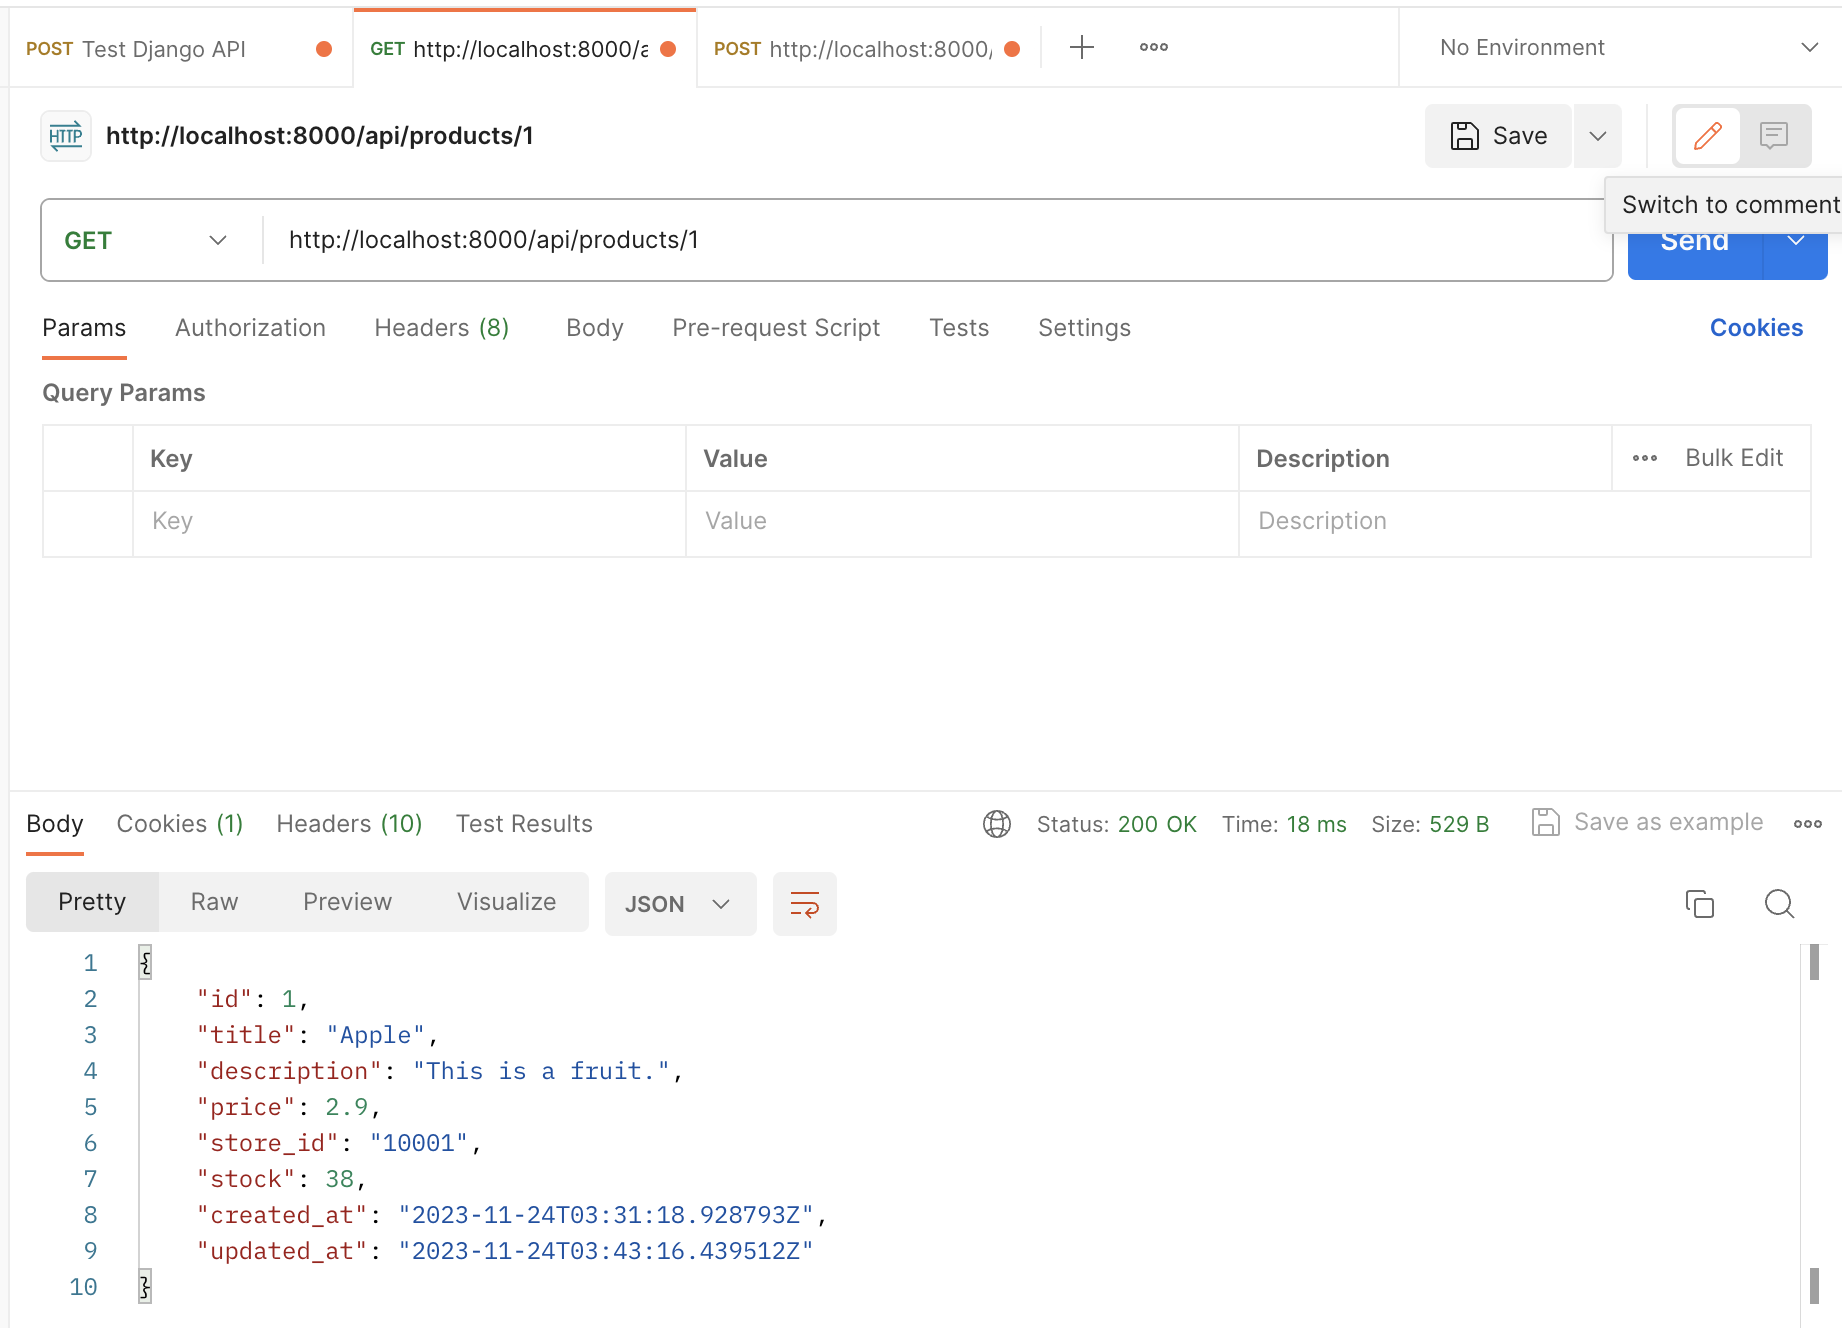
The celery log indicates that the job was processed twice. Additionally, we observe a reduction in the product stock to 38.
If we haven’t explicitly set acks_late to True, the message is automatically removed from the queue as soon as a worker retrieves it. When the acks_late is set to True, the task messages will be acknowledged after the task has been executed.
In our case, the job takes longer to process than the visibility timeout. When the visibility timeout elapses, the message returns to the queue. Afterwards, the job processes again. The previous instance of the job had already acknowledged successful processing, resulting in the deletion of the message and preventing it from reappearing in the queue.
The maximum visibility timeout for an SQS message in Amazon Simple Queue Service (SQS) is 12 hours (43,200 seconds). It’s important to set the visibility timeout appropriately based on the expected processing time of your tasks. If tasks frequently take longer to process than the visibility timeout, you might need to adjust your concurrency, visibility timeout, or retry settings to ensure efficient and reliable task processing.
8. Conclusion
In conclusion, this Django Celery SQS tutorial has covered the integration of Celery with Django using SQS (Simple Queue Service) as the message broker. It has demonstrated how to configure Celery in a Django project, create and execute tasks asynchronously, and handle long-running tasks efficiently. The tutorial has also addressed specific issues related to message visibility timeout, automatic message deletion, and task duplication.
For more details and a comprehensive list of configuration options, refer to the Celery Configuration documentation. Explore these options to fine-tune Celery for your application’s requirements. Full source code is available on GitHub.
Share this content:
